
by ShotBox
Welcome to Healcraft.net’s Restoration Shaman Guide! As always, if you have any questions or comments, please comment or tweet us @Healcraft. Please note, this guide is for Restoration Shaman in raid environments. For our Mythic+ and dungeon information, please click here (coming soon). In addition, we cannot cover every aspect of the class in this guide, so be sure to check out our advanced healing articles for even more information.
Introduction
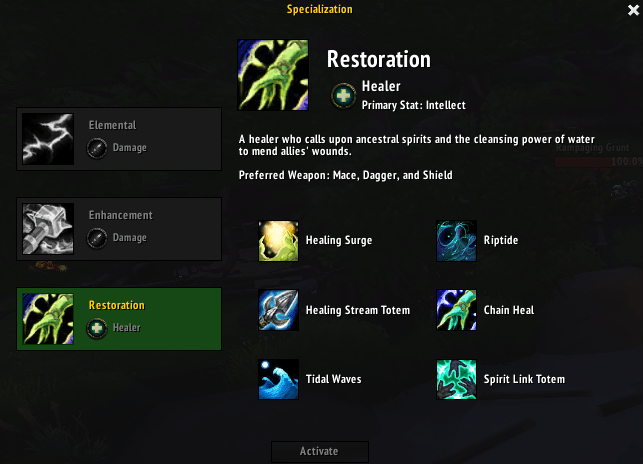
Restoration Shamans excel at area of effect healing. Additionally, due to their Mastery, their healing gets stronger as the target’s health gets lower. Although Restoration Shamans can provide good raid healing, it is ultimately their wide variety of utility and raid cooldowns that fill a niche in raid compositions.
If you would like to interact with other shamans, check the Restoration Shaman Discord – Ancestral Guidance! Feel free to ask me any healer questions you may have on twitter, or you can ask me live at on Twitch, where I stream regularly!
Table of Contents
 Rotation
 Talents
 Essences
 Stats
 Corruption
 Boss Guides
 Addons and Macros
 More Information
Rotation
Note: Healing doesn’t follow a strict rotation and this is more of a guideline. Additionally, this is tailored for raids. Please visit our Mythic+ guide (coming soon) for information regarding dungeons.
1) Cast Riptide on cooldown, prioritizing tanks or targets with damage over time effects.
2) Cast Healing Rain on cooldown on groups of players. Healing Rain is a strong, efficient group heal; however, it has a long duration heals slowly. Due to its 10 second duration, avoid casting in areas where it will not be utilized for the full duration.
3) Drop Healing Stream/Cloudburst when ever damage goes out.
4) Cast Healing Wave for spot healing during light to moderate damage.
5) Cast Chain Heal during moderate to heavy raid damage. This is your primary raid healing tool.
6) Keep Flame Shock up on targets that survive for most of its duration.
7) Weave in Lava Burst and Lighting Bolt during periods of low damage.
Cooldowns
Healing Tide Totem – This is our raid throughput cooldown. HTT provides healing to all targets within 40 yards for 10 seconds. This cooldown is best used for heavy periods of damage. Additionally, because this is a totem and does not require casting or channeling, this cooldown is especially useful during periods of high damage and movement.
Spirit Link Totem – This is arguably one of the most useful cooldowns in the game. Spirit Link Totem grants 10% reduced damage to all allies within its 20 yard radius. Additionally, every 1 second it pulses, it redistributes health among all allies inside. With Azerite traits in BFA, Sprouting Spirits was also introduced. Running 1-2 of these traits adds a substantial burst of healing to all allies located within the link 1 second after it is placed. This trait also increases the radius of our link by 15%. This healing also interacts with our mastery.
Spiritwalker’s Grace – A utility cooldown which allows shamans to cast abilities while moving for 15 seconds. Considering that most of our kit is hard cast abilities, this cooldown is essential for allowing us to continue healing during periods of mobility.
Talents
Talent Cheat Sheet
The cheat sheet below is a very generalized talent build suggestion. Due to the situational nature of healing, you’ll likely change talents often. For more detail, read the talent explanations below or scroll down to the Boss Guides section. Additionally, this is tailored for raids. Please visit our Mythic+ guide for information regarding dungeons.

Talents Advanced

Torrent
Due to Riptide being one of our most efficient heals, a talent to buff it further at first might seem like it is a good choice. While this talent is good on its own, the other talents on the row simply outpace it in most scenarios.
Undulation
This talent is strong in situations in which your Healing Wave or Healing Surge are a main source of healing. This is usually taken when large amounts of single target healing is needed, or for spread fights that leave Chain Heal unable to bounce to additional targets.
Unleash Life
This will be your default choice in almost every situation. The instant healing it provides is great for fast spot-healing. Furthermore, the 35% increase to the next direct heal you cast is great. When paired with High Tide (see below), this can lead to very big chain heals. Unleash Life also buffs both the initial heal, and heal of time effect of Riptide. Due to this, its best to use unleash life when ever its off cooldown, and consume its buff with either Riptide or Chain Heal.

Echo of the Elements
The strongest choice of the row. Echo of the Elements opens up options for healing and DPS. The talent provides a second charge of Lava Burst. This allows for more efficient use of Lava Surge procs by adding another charge and avoiding potentially wasted reset CDs. The second charge of Healing Stream Totem also applies to Cloudburst Totem, if taken. This allows you to be more flexible with your Cloudburst timing, or lets you drop up to three totems back to back for long periods of heavy damage (note that only one Cloudburst Totem can be active at time).
Deluge
This is a very situational pick, with it only being able to find success when your group is consistently stacked up in your Healing Rain. While this talent also effects players with Riptide, the nature of Chain Heal causes these two spells to have poor synergy with each other. This paired with the fact you would be loosing out on Echo of the Elements leads to this being only picked up when healing is tight and your group is fairly stationary.
Earth Shield
This is the weakest choice in this row. The healing it does is similar to a Riptide, and the healing buff is half of what Deluge has to offer and only on a single target. In almost every situation that you would consider taking this talent, it would make more sense to take Deluge.

Spirit Wolf
This is a great choice for when you don’t have a specific need for the other two options in this row. Great for helping shore up some of our lack of mobility and can sometimes be used defensively before large bursts of damage.
Earthgrab Totem
A great bit of utility for fights that benefit from roots. Though this talent is usually more useful in mythic+, it is also incredibly useful for those who run >40 corruption, because you can root Things from Beyond.
Static Charge
Similar to Earthgrab Totem, this can be a nice boost to utility. However, there is rarely any need for this talent in a raid setting. This is talent’s strength is in its applications for mythic+ and PvP.

Ancestral Vigor
Although this is a decent choice if you find that members of your group do not have the health pool to survive heavy hitting mechanics, you rarely will run into situations that this would be more useful than the other two options in this row.
Earthen Wall Totem
This is your go to choice on farm, or for fights that don’t require the use of Ancestral Protection Totem (see below). With its ability to shield allies, you will want to use this during periods of predictable constant raid wide damage as opposed to single bursts of damage.
Ancestral Protection Totem
This talent can be one of the most useful talents for your raid during progression. Granting an ally who dies within its range the ability to Reincarnate allows for an additional battle resurrection (this totem does not consume one of the raid’s battle resurrection charges). This tool can be used to negate some mechanics by planning to have someone die within the totem and receiving an instant resurrection. It is important to note that this does not work if the player dies due to massive damage (meaning, damage that exceeds 200% of you maximum health). Even for encounters that might not have a use for negating mechanics, this can also be used as an additional raid CD, to provide a free resurrection in case a raid member dies.

Nature’s Guardian
Nature’s Guardian is mostly suited for PvP situations. This can be used for a strong self heal while stunned or silenced, but has very situational uses.
Graceful Spirit
The talent is a solid go-to choice for most scenarios. This talent allows greater frequency of access to Spiritwalker’s Grace with a movement speed bonus.
Windrush Totem
This talent is very good on specific encounters (see below) where your group needs a raid wide movement speed buff in order to deal with certain mechanics.

Flash Floods
A decent choice when quick, single target healing is a priority. Flash Floods introduces an interesting way to play that requires management of your Tidal Wave and can lead to a smoother feeling play style. Despite that, it is rare that you will find yourself picking up this talent for raids, as it tends to be very mana inefficient in order to pace the other talent’s throughput. Flash Floods is best suited for mythic+ or PvP.
Downpour
Downpour offers a strong burst of group healing, but has a longer cooldown the more targets it hits. Due to this, Downpour tends to fall behind Cloudburst totem in throughput and is more suited for a Battle Shaman play style (see More Information).
Cloudburst Totem
This should be your go-to for raiding. Allowing you to store healing and release it in short windows is a great tool for additional throughput. This talent replaces your Healing Stream Totem, but still benefits from Echo of the Elements. Proper timing on Cloudburst is very important; therefore, pairing these two talents together gives you much more flexibility. There are a few important things to note about this ability. First, certain healing affects from Azerite traits (such as Sprouting Spirits) will not contribute to the healing stored in your Cloudburst. However, traits that buff your base line healing (such as Turn the Tide) will benefit. Next, Healing Tide Totem’s healing will not contribute to Cloudburst. Finally, you can manually active Cloudburst’s healing effect before its 15 second duration is up in order to properly time the healing for when the raid needs it most.

High Tide
High Tide offers the most throughput on this row. Given our heavy use of chain heal, it is our best choice. High Tide is already very strong on its own, but when paired with Unleash Life it gets that much better. With the aid of a Weak Aura (see Addons and Macros) you are able to track how close you are to you next High Tide proc. Managing you mana by lining procs up with spikes of damage and Unleash Life allows for massive amounts of healing from a single Chain Heal.
Wellspring
This talent is great in theory, but not so great it practice. Wellspring tends to be a lackluster ability. It may seem like it should be a powerful ability on a reasonable cooldown. However, this ability has a soft target cap. The total effective healing is capped at 6 targets. If Wellspring hits more than 6 targets, the healing is evenly split among all targets hit. Though Wellspring can assist in extending our mana pool in long fights or help us with spread healing more, you lose out on the throughput which High Tide has to offer or the burst healing of Ascendance.
Ascendance
Ascendance is a strong raid cooldown, which allows you to double the throughput of your spells for a short period of time. This can help during periods of heavy damage and is a decent pick if your team is short on raid cooldowns. However, a short uptime over the course of a fight leads Ascendance to be out performed by High Tides in most scenarios.
Essences
The essence builds below are meant to be a general guideline for the most popular and effective load outs.

Essence Builds
The bold essences below indicates that it should be used in the Major Essence slot. The essences that follow the underlined name should be used in the Minor Essence slots.
Low Gear / Mana Management Build: Memory of Lucid Dream, Conflict and Strife,The Ever-Rising Tide, Unwavering Ward
Good Gear / Maximum Throughput Build: Vision of Perfection, Conflict and Strife, The Ever-Rising Tide, The Formless Void
Major
Vision of Perfection
Almost always the best choice. This essence is especially strong on fights where you either don’t need the extra mana regen from Lucid Dreams, or for fights with lots of constant damage. This will provide additional healing for free. Given the damage patterns of Ny’alotha, you can get great value from this option on almost every fight.
Memory of Lucid Dreams
Memory of Lucid Dreams is a good choice if you find yourself struggling with mana. Generally taken when your gear is lower, you lack the Critical Strike rating to get good usage of Resurgence, or do not have access to Peerless Alchemist Stone.
Minor
Conflict and Strife
It is best to think of this essence as a free 528 Versatility buff because its up time should be very close to 100%. Given the nature of this stat buffing our healing, damage, and reducing incoming damage, this is a very valuable pick up for any build.
The Ever-Rising Tide
This can act as another way of having some extra mana regeneration and provides a large intellect buff for 10 seconds, with a 20% chance of giving both. As an added bonus, the chance of getting the extra mana from Ever-Rising Tides is increased the lower mana you are at. This is another good pick for almost all situations.
The Formless Void
Out of the 3 essences that offer an extra 10 corruption resistance, this tends to be the front runner. Granting a nice intellect buff when ever an ally within 20 yards casts their major essence ability. With intellect being our most desired stat, and its relatively high up time, you guaranteed to get the most throughput out of this option. The larger the group size, and therefore more chances for other players to use a major essence, the better this essence becomes.
Unwavering Ward
This is a good alternative for a +10 corruption resistance essence slot. Becoming even stronger on fights were you find yourself grouped up and can spread its shield/damage reduction more, this can easily become more valuable than The Formless Void. The strength lies in the 3% damage reduction buff, with it being best suited on large bursts of damage. As long as the shield absorbs at least 1 point of damage, the entire hit of damage is reduced by 3%. This damage reduction also stacks with other healers Unwavering Ward stacks. On stacked up fights, with a burst damage pattern this is the recommended choice.
Spirit of Preservation
This one is for VERY niche situations. Mostly suited for M+, this can be used on fights that your raid is spread out far enough that chain heal is no longer viable to cast, and healing surge is your highest healing spell used. Within Ny’alotha, Il’gynoth is the only fight where this could a viable option depending on your raids strategy. Please refer to Il’gynoth’s boss guide below for more information.
Stats
Intellect > Critical Strike > Versatility = Mastery = Haste
For Restoration Shamans it is important to consider that all of our secondary stats are very close together in effectiveness. They are all ranked very close together (with critical strike rating being slightly ahead of the other secondary stats). Due to this, more often than not you will want what ever has the highest item level, favoring items with critical strike and versatility on them. Please note that corruption does change this assessment substantially (see Corruption section below for more information).
Intellect is a primary stat that provides 1 Spell Power (SP) per point. Spell Power increases how much your spells heal for.
Haste increases casting speed and makes our heal over time abilities have more ticks that occur more frequently.
Mastery increases healing done to your target based on their current health. Lower health targets are healed for more.
Critical Strike increases the chance to critically hit with abilities.
Versatility increases all damage and healing done, and decreases all damage taken.
Stat Math
The following information shows you how much second stat rating you need for a 1% increase. These will be heavily modified by corruptions (see below).
1% increase in haste = 68 rating
1% increase in mastery = 24 rating
1% increase in critical strike = 72 rating
1% increase in healing from versatility = 85 rating
Gems & Enchants
Rings: Enchant Ring – Accord of Critical Strike
Weapon: Enchant Weapon – Machinist’s Brilliance
Gems: Socket one Leviathan’s Eye of Intellect, then the rest as Deadly Lava Lazuli.
Consumables
Food: Mech-Dowel’s “Big Mech”
Potion: Potion of Replenishment for maximum regeneration. If you cannot channel for at least 5 seconds, use Coastal Mana Potion. If you do not need mana, use Superior Battle Potion of Intellect.
Flask: Greater Flask of Endless Fathoms
Augment Rune: Lightning-Forged Augment Rune, or Battle-Scarred Augment Rune if you do not have the reputation.
Race
Alliance: Dwarf, Dark Iron Dwarf
Both Dwarf and Dark Iron Dwarf are strong choices for Alliance, as Stoneform and Fireblood are both strong cooldowns with wide applications to both.
Horde: Goblin
For the Horde, Goblin is going to be your best pick, as Rocket Jump helps make up for our lack of mobility, as well as can be used occasionally be use to trivialize mechanics.
Corruption
Corruption Vendor
With the latest major update, you can now buy your corruptions from MOTHER with Echoes of Ny’alotha. To see when each corruption effect will become available in the rotation, please look at Wowhead’s Corruption Vendor Rotation page.
For raiders, the safest option for spending Echoes of Ny’alotha is to spend them all on Severe III (for 5,000 Echoes) whenever it is available. You can also buy Severe I and Severe II in order to round out your total levels of corruption without going too high too quickly.
Best Corruptions
- Severe – It is recommended to stack as many of these as possible (outside of your raid weapon, see below). Severe allows for us to stack our critical strike very high. This lets us regenerate much more mana through Resurgence, which lets us spend more mana on Chain Heals, and leads to more High Tides procs.
- Flash of Insight (Mar’kowa, the Mindpiercer) – This weapon is dropped from Drest’agath. Granting between 1% and 8% additional intellect at all times means your will average an extra 4.5% intellect throughout a fight.
- Expedient, Masterful, Versatile – As stated earlier, all of the secondary stats are good for us, but they just tend to be a bit behind critical strike rating. Due to this, these corruption effects all perform satisfactorily. It is important to note though that they are just amplifiers, so you want to have a healthy amount of the stat before hand to really get good use out of them (1500+ is recommended).
Boss Guides
The suggested talent builds for the fights below are meant to provide the best assistance to the raid team during progression. These are not the only viable talents, and various talent combinations work for many of these fights. Also, remember that the talents are selected to maximize the potential for success on progression, not for parsing. Due to this, the important talents section will only cover talents that are specifically strong for the boss. It is recommended that you treat Wind Rush Totem as your default, swapping to Graceful Spirit only when your raid does not require Wind Rush. Do not take these talent suggestions as law, they can be changed based on the individual situation.
 Wrathion, The Black Emperor
Important Talents
Spirit Wolf, Earthen Wall Totem
Essences
Vision of Perfection, Conflict and Strife, The Formless Void, The Ever-Rising Tide
Healing Strategy
With a fight with large periods of movement, Spirit Wolf is a good pick up here. It helps you get to safe spots faster. Furthermore, on mythic difficulty, it leads to keeping your stacks lower than otherwise. Using Earthen Wall Totem once you raid is stacked up in the safe spot is also the best time during the fight to use it, as the ticking raid wide damage ensures that the damage absorb is fully utilized. Pre-casting and building up your cloudbursts are also decent ways to help deal with the bursts of damage through out the fight. Lastly, using Spirit Link right at the end of Gale Blast is generally a good place to pop it, as melee will generally be running out into the range, increasing how many people you can get into your SLT.
 Maut
Maut
Important Talents
Earthen Wall Totem or Ancestral Protection Totem
Essences
Vision of Perfection, Conflict and Strife, The Formless Void, The Ever-Rising Tide
Healing Strategy
This is another fight where you can reliably get full use out of Earthen Wall Totem. Dropping it at the start of phase 2, before the healing buff goes onto the raid helps keep people stable. Alternatively, if you find that raid members are dying during phase 2, Ancestral Protection Totem is a great tool both with its raid wide health buff, and its free battle resurrection for DPS players who may accidentally one-shot themselves with corruption mechanics. Make sure you have two charges of Cloudburst Totem going into phase 2, as the healing buff you receive makes Cloudburst effect even more efficient. Note that on mythic difficulty, Ancient Curse is something you can dispel, this is helpful for your tanks or allows you to dispel yourself, saving you from the extra movement needed to clear your stacks with a puddle.
 The Prophet Skitra
Important Talents
Earthgrab Totem, Earthen Wall Totem
Essences
Vision of Perfection, Conflict and Strife, The Formless Void, The Ever-Rising Tide
Healing Strategy
Throughout the fight, Prophet Skitra will spawn a wall of adds the deal major damage to anyone underneath them, walking in a line from one side of the room to the other. These adds can be rooted with Earthgrab Totem and allows for you to make an opening for your raid to safely maneuver around them. During her second phase, the raid takes ticking damage that increases the longer you stay in the phase. Use Spiritwalker’s Grace while running towards the correct illusion and Earthen Wall Totem once the raid is stacked up.
 Dark Inquisitor Xanesh
Important Talents
Earthen Wall Totem, Graceful Spirit
Essences
Vision of Perfection, Conflict and Strife, The Formless Void, The Ever-Rising Tide
Healing Strategy
This is a straightforward fight to heal. Constant raid wide damage makes using Healing Rain and Earthen Wall Totem on cooldown recommended. You should almost always be getting full use out of them. Spiritwalker’s Grace is also very helpful while Torment is going out. Since this happens frequently, and there isn’t usually any need for Wind Rush Totem, having a 1 minute cooldodwn on Spiritwalker’s Grace is very valuable. Outside of that, using Cloudburst on cooldown, and keeping Riptides on debuffed raid members is also recommended.
 The Hivemind
Important Talents
Earthen Wall Totem or Ancestral Protection Totem, Graceful Spirit
Essences
Vision of Perfection, Conflict and Strife, The Formless Void, The Ever-Rising Tide
Healing Strategy
Earthen Wall Totem’s cooldown lines up perfectly with phase transitions. Each time the phase changes (bosses pulled together or apart) there is a large amount of ticking raid damage that goes out which is perfect for Earthen Wall Totem. However, during progression, there may be an add explosion and potentially a lack of cooldowns to deal with it. If this is the case, Ancestral Protection Totem is a great talent to pick. This will help get you past that last bump. It is also recommended to try and have your raid loosely stack right before Volatile Eruption, as Spirit Link with Sprouting Spirits Azerite is the perfect cooldown to deal with this. If playing with Sprouting Spirits, you want to make sure that you wait until the cast time has less than 1 second remaining before dropping your totem. This allows for the raid to have their health stabilized and receive the damage reduction before the burst of damage, but also allows for you to get a Revival-like burst of healing immediately after.
 Shad’har the Insatiable
Important Talents
Spirit Wolf, Ancestral Protection Totem, Graceful Spirit
Essences
Vision of Perfection, Conflict and Strife, The Formless Void, The Ever-Rising Tide
Healing Strategy
Given then constant damage and the raid being loosely stacked, make sure you have healing raid down at all times. When getting fixated by an add, Ghost Wolf will help counter the slow. Spirit Wolf helps you get out faster, and keep incoming damage down when the add hits you. Although this is a decent fight for Earthen Wall Totem, Ancestral Protection Totem will come in very handy towards the end of the fight while progressing.
 Drest’agath
Important Talents
Ancestral Protection Totem
Essences
Vision of Perfection, Conflict and Strife, The Formless Void, The Ever-Rising Tide
Healing Strategy
This is a “dance fight”, meaning that you will be moving around on a set pattern thoughout the encounter. It is important to keep track of these moments to ensure proper use of Healing Rain. Throughout the fight, various tentacles of Drest’agath will spawn. These have a cloud around them which prevents line of sight. It is important to note though that you can still cast a healing rain into it from the outside, as well as raid wide healing like Healing Stream Totem or Cloudburst will still hit targets withing the cloud. Saving Ancestral Protection Totem for the end is also important, as during progression its very common to get a dangerous Entropic Crashes bringing your raid dangerously low, often killing people in the process.
 Il’gynoth, Corruption Reborn
Il’gynoth is a fight that has several different strategies that can greatly alter the play style needed to heal this fight well. Due to this, I will include highlights for both the “Spread Strategy” (stays the same for dispel or no dispel strategy) and “Stack Strategy”. When dispelling on mythic, it is important to make sure that your targets circle is as small as it can get. Dispelling someone when their circle is big can very easily cause a chain reaction and instantly wipe your raid.
Important Talents (Spread)
Undulation, Echo of the Elements, Ancestral Protection Totem, Graceful Spirit, Cloudburst Totem, Ascendance
Essences (Spread)
Vision of Perfection, Conflict and Strife, The Ever-Rising Tide, Spirit of Preservation
Healing Strategy (Spread)
The Spread strategy, regardless of dispel or no dispel, leaves your chain heal to be incredibly unreliable for jumping to targets. Due to this, a single target focus build is a much better option. Very different from our normal chain heal spam play-style, with this set up you want to utilize your Tidal Wave stacks, and focusing on Riptide, Healing Wave and Healing Surge spam. Always make sure that when you use Ascendance, you are dropping a Cloudburst right before you pop Ascendance. This allows you to stack a very large Cloudburst by spamming Healing Surge. Its not worth dropping Healing Rain when you can only get 2-3 players in it, so there is no need to worry about casting it. As usual, Ancestral Protection Totem is very helpful towards the end of the fight when things are getting hectic, and people are struggling to stay alive. Please note that the strength this time comes from the 10% HP increase, and you should not attempt to utilize the resurrection from the totem if you are doing the no dispel strategy because it will wipe your raid.
Important Talents (Stack)
Unleash Life, Echo of the Elements, Earthgrab Totem, Earthen Wall Totem, Graceful Spirit, Cloudburst Totem, High Tide
Essences (Stack)
Vision of Perfection, Conflict and Strife, The Formless Void, The Ever-Rising Tide
Healing Strategy (Stack)
Healing in a stacked strategy puts us back into our normal Chain Heal spamming play-style. The fight will end up looking a lot like it does on heroic, but with dispels. Your raid will be loosely stacked and rotate around the room as the fight goes on. There should be enough people clumped together to justify keeping Healing Rain down, and Chain Heals should be able to jump fully as normal.
 Vexiona
Important Talents
Spirit Wolf, Ancestral Protection Totem, Graceful Spirit
Essences
Vision of Perfection, Conflict and Strife, The Formless Void, The Ever-Rising Tide
Healing Strategy
The damage patterns on this fight can take time to get used to. Luckily, this is a mostly stacked encounter with moments of large movement needed while Vexiona is up in the air. During these phases are perfect timing to use Spiritwalker’s Grace. Timing you cloudbursts with burst of damage will also help with healing a lot on this fight. Ideal Spirit Link placement doesn’t happen until near the end of the fight, so often you can use it either for a tank, or as just extra mitigation on the raid early on in the fight.
 Ra-den the Despoiled
Important Talents
Ancestral Protection Totem
Essences
Vision of Perfection, Conflict and Strife, The Formless Void, The Ever-Rising Tide
Healing Strategy
The healing required during the first phase of the fight is moderate with good AoE healing opportunities. Phase two is when you really have to focus. During this phase some members of your raid will get Corrupted Existence. Healing these targets to full while this is active on them will instantly kill them. A safe way heal this phase as a Shaman is to play almost the same way you normally would. Generally on other fights you want to be chain healing off the lowest target you can. This is not always the case on this encounter. It’s best to continue to cast Chain Heals but you will want to make sure you never cast Chain Heal directly onto a target with Corrupted Existence. Always prioritize those without the debuff, as it’s likely that Chain Heal will still get to them, but at a reduced and more safe amount of healing. Also, avoid pairing Unleash Life/High Tide procs together and you can very easily have a big Chain Heal jump to someone with the debuff and kill them.
 Carapace of N’Zoth
Important Talents
Spirit Wolf, Earthen Wall Totem, Wind Rush Totem
Essences
Vision of Perfection, Conflict and Strife, The Formless Void, The Ever-Rising Tide
Healing Strategy
This fight will test how well you can manage your mana while progressing. Most strategies for this boss utilize speed potions during the 3rd phase. This means that you will be unable to use a mana potion throughout the fight. Though it is still very possible to do this fight without Lucid Dream, don’t hesitate to pick it up if you feel you are struggling with mana. Each phase requires more healing, so plan out your mana accordingly. There are lots of opportunities for AoE healing throughout the fight, so as usual, Healing Rain placements will be important. Spirit Wolf can be very helpful during phase 2 when maneuvering through Mycelial Cysts. There are also several different times throughout the fight that Wind Rush Totem can be useful, so odds are there is a slot which youf raid will want it at. The last important thing to note is that the fears from Madness Bomb can be removed with Tremor Totem. This can be helpful during transitioning from P1 to P2, P2 to P3, or for a raid wide set of bombs in P3 right before an Infinite Darkness.
 N’Zoth the Corruptor
Important Talents
Spirit Wolf, Earthen Wall Totem or Ancestral Protection Totem, Graceful Spirit or Wind Rush Totem
Essences
Vision of Perfection, Conflict and Strife, The Formless Void, The Ever-Rising Tide
Healing Strategy
This fight is another “dance” fight with periods of movement. As such, there is less emphasis on Healing Rain than on other fights. You want to make sure you are only casting Healing Rain when you know there wont be any movement for a while. This is also a fight that requires all of your raid CDs being predetermined during progression. Earthen Wall Totem is a great choice on this boss as there is always damage going out and you can fairly reliably get full use out of each cast. However, depending on your guilds strategy, you may find yourself utilizing Ancestral Protection Totem to sacrifice a raider for later Harvester soaks. Wind Rush Totem can also be a great piece of utility for your raid, but if your raid does not have a need for it, Graceful Spirit will help tremendously with healing since there is so much movement throughout the fight. Spirit Link Totem is also best used with either Harvester raid soak, or right as an Anguish is coming out. They are both mechanics that you can time Sprouting Spirits for great value. Lastly, it should be noted that fear caused by the beams (Stupefying Glare) can be removed with Tremor Totem, this can be helpful if someone get hit by a beam but manages to live through the damage.
Addons & Macros
Raid Frames

The primary addon for any healer should be their raid frames. There are several good raid frame addons available. The differences come down to personal preference. I recommend one of the following:
WeakAuras 2
One of the most useful addons in the game. This allows you to track CDs, buffs, mechanics, timers, and much more. Most guilds require this addon so players can import custom made strings for particular bosses.
WeakAura 2 Strings
Most WeakAuras can be found on Wago.io. You can also use the WeakAuras desktop client to keep your auras automatically up to date.
Macros
Basic Mouseover Macro
Allows you to cast a spell on an ally by hovering over their raid frame and hitting the associated keybind. Replace SPELL with a spell name.
#showtooltip SPELL

/cast [@mouseover,help,nodead] SPELL
More Information
For more advanced information regarding healing, please check out our various other articles!
In our tips and tricks series of articles we provide unique and interesting tips and tricks for healers on specific encounters. Which talent should you take on a particular fight? How do you deal with a certain mechanic given your toolkit? All of these are explained in the tips and tricks series!
Our encounter guides are different from other standard mass-produced guides because they focus primarily on the healer perspective. How is this different from the tips and tricks articles mentioned above? Tips and tricks focuses on advice for a specific class or specialization on an encounter. However, the encounter guides are more board and are aimed to help raid/healing leads understand all the healing details of a fight.
Self-explanatory! Our best in slot lists are constantly updated following hot-fixes, patches, or anything else that alters what gear we are going after. Don’t worry about doing all the tricky math, we’ll do it for you.
Almost everything else can be found on our theorycraft page! Many of our readers found us through our various spreadsheet work (example 1 & 2), and we plan to continue to provide the community with great tools to evaluate their healers.
Conclusion
Thanks for checking out our Restoration Shaman guide! We hope that it was helpful for you and your raid team. If you have any questions please comment below or tweet us @Healcraft. We will attempt to answer them as soon as possible. As always, if you believe anything to be inaccurate or out of date, please let us know! Finally, there is only so much you can include in one healing guide, so be sure to check out all of our advanced healing resources. Again, thanks for reading and Happy Healing!

2 comments