
 by Lavathing
UP-TO-DATE GUIDE FOR LEGION AVAILABLE HERE
THIS PAGE WILL BE UPDATED SHORTLY AFTER LAUNCH!
Welcome to Healcraft.net’s Restoration Druid Guide! As always, if you have any questions or comments, please comment or tweet us @Healcraft. In addition, we cannot cover every aspect of the class in this guide, so be sure to check out our advanced healing articles for even more information.
Introduction
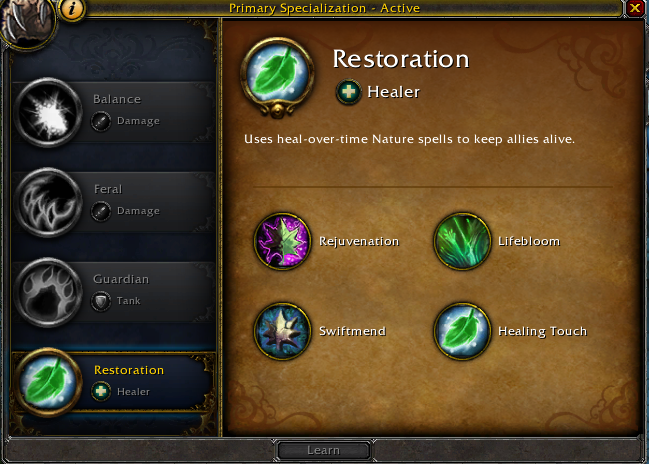
Restoration Druids specialize in healing over time and raid healing abilities. With most abilities being instant cast, Restoration Druids are also great for high movement encounters. We excel at blanketing the raid with healing and providing sustained throughput. Additionally, due to a variety of viable talent choices, Restoration Druids are able to adapt to various situations and encounters.
If you’d like to interact with other druids, head over to the Druid IRC chat at #Moonglade! Also, I regularly answer questions and discuss healing topics on twitter, so be sure to follow and shoot me a tweet!
Table of Contents
 Rotation
 Talents
 Glyphs
 Stats
 Boss Guides
 Addons and Macros
 More Information
Rotation
Note: healing doesn’t follow a strict rotation and this is more of a guideline.
1) Use a direct heal to apply the Mastery: Harmony buff. Maintain this buff 100% of the time.
2) Keep Lifebloom and a Rejuvenation on the active tank at all times. Lifebloom can be swapped to non-tank targets taking moderate to heavy damage.
3) Keep Wild Mushroom down. Usually keeping it in melee is a safe bet. However, if the ranged are taking significant raid damage and are stacked, you can place it in ranged.
4) If you have the Soul of the Forest talent, use Swiftmend off cooldown followed by a Wild Growth. You can save this combo for a few seconds if you know there is upcoming raid damage.
5) Consume Omen of Clarity buffs with Regrowth casts. If no one is low, use this on your current Lifebloom target to refresh its duration.
6) Without the Soul of the Forest talent, use Wild Growth when several members of the raid take damage. Due to Warlords of Draenor’s change to smart healing, make sure many raid members are injured to increase the likelihood of effective healing.
7) Without the Soul of the Forest talent, use Swiftmend on targets that have taken moderate to heavy damage. While you do not need to use this off cooldown without Soul of the Forest, Swiftmend is an efficient way to keep Harmony refreshed when you do not have Omen of Clarity procs.
6) Use Rejuvenation as a filler ability on players that are, or are about to, take damage.
7) If you have the Dream of Cenarius talent, use Wrath as a filler during low periods of damage.
Cooldowns
Tranquility – Our signature three minute cooldown ability. Tranquility is arguably one of the largest healing throughput cooldowns in the game, and can be used to heal through dangerous parts of an encounter. Tranquility’s shortcoming is that you must stand and channel it, due to this, we must plan our Tranquility uses wisely. This ability will almost always be assigned by your raid or heal leader. If not, use this during periods of heavy raid damage.
Nature’s Swiftness – Often overlooked and sometimes not considered a “cooldown”, Nature’s Swiftness is an essential part of our toolkit. Always use this with Regrowth for maximum throughput. Try to use this ability nearly off cooldown on players that are low health.
Ironbark – This external tank cooldown is unique due to its very low cooldown of one minute. While other cooldowns have much larger damage reduction, Ironbark fills the niche of an external that can be used very frequently. Additionally, at level 100, Ironbark targets take 20% more healing from your HoTs.
Incarnation: Tree of Life / Heart of the Wild / Nature’s Vigil – All cooldowns tied to talent choices. Read below for more information regarding Talents.
Talents
Talent Cheat Sheet
The cheat sheet below is a very generalized talent build suggestion. Due to the situational nature of healing, you’ll likely change talents nearly every encounter. For more detail, read the talent explanations below or scroll down to the Boss Guides section.
Level 15: Displacer Beast
Level 30: Ysera’s Gift
Level 45: Typhoon
Level 60: Incarnation: Tree of Life
Level 75: Ursol’s Vortex
Level 90: Heart of the Wild
Level 100: Germination
Talents Advanced
Level 15: Feline Swiftness, Displacer Beast, Wild Charge
Feline Swiftness
Provides a passive movement speed buff.
Displacer Beast
Provides a blink and short duration sprint. This is your go-to choice, the utility of a blink is too good to pass up on for most encounters.
Wild Charge
Provides various utility abilities related to movement; very rare and situational use.
Level 30: Ysera’s Gift, Renewal, Cenarion Ward
Ysera’s Gift
Provides a passive self-heal that can also heal allies when you are at full health. This is the strongest talent for most situations.
Renewal
Provides a moderate self heal on a 2 minute cooldown. The weakest of the three talents.
Cenarion Ward
Provides an activated heal over time ability when the target takes damage. This talent is capable of similar throughput as Ysera’s Gift, but requires mana and a GCD every 30 seconds. Due to this, this talent is only useful on very high tank damage encounters.
Level 45: Faerie Swarm, Mass Entanglement, Typhoon
Faerie Swarm
A single target slow, situational use.
Mass Entanglement
An area of effect root effect. However, since the roots are broken on damage, this ability is very situational.
Typhoon
A knock back and daze effect. Situational use and usually the go-to talent for most encounters.
Level 60: Soul of the Forest, Incarnation: Tree of Life, Force of Nature
Soul of the Forest
A short cooldown buff to various healing abilities. Almost always paired with Wild Growth for maximum throughput. Provides the most sustained and potential throughput of this tier’s talents, but requires constant raid damage. Has less burst healing potential than Incarnation and thus is taken situationally.
Incarnation: Tree of Life
A long cooldown that buffs various healing abilities and provides a 30% reduction in mana cost for Rejuvenation. This ability adds two extra Wild Growth effects per cast, makes Regrowth instant cast, and increases the healing done by Rejuvenation by 50%. Incarnation is a situational talent choice for fights with staggered burst damage phases; especially those that are 1, 1.5, or 3 minutes apart. Additionally, a good talent for low levels of spirit due to the mana savings on Rejuvenation.
Force of Nature
The weakest of the three talents. Provides single target smart healing by summoning treant pets. Do not use at all this tier.
Level 75: Incapacitating Roar, Ursol’s Vortex, Mighty Bash
Incapacitating Roar
A small area of effect ability that incapacitates targets for 3 seconds. Situational use.
Ursol’s Vortex
A unique ability that holds enemies in one place by pulling them to the center of the vortex when they first try to escape. Additionally, provides a slow effect on enemies in the vortex. Units that are immune to grip effects will not be pulled by the vortex, but they will be slowed.
Mighty Bash
Provides a long duration (5 seconds) single target stun. Situational use.
Level 90: Heart of the Wild, Dream of Cenarius, Nature’s Vigil
Heart of the Wild
A long cooldown ability that dramatically increases healing and damage done. For encounters with tight enrage mechanics or priority targets, this ability can be used to do a moderate amount of burst DPS. However, most of the time we use the strong 45 second healing buff paired with Tranquility for massive amounts of healing. This talent is an excellent choice on any encounter where Tranquility plays a major role, and thus is our go-to talent choice for this tier.
Dream of Cenarius
A passive increase to Wrath‘s damage and converts 150% of its damage into smart healing. With this talent, use Wrath as your filler ability rather than Rejuvenation during low raid damage. Due to current spirit levels and the Phylactery trinket, this is no longer taken. However, at very low item level and on lower difficulties (thus more periods of low damage), this talent is viable.
Nature’s Vigil
A short cooldown ability that causes your single target healing abilities to splash to nearby allies, healing them for 20% of the initial heal. Additionally, causes single target healing to do 20% of its healing as damage to nearby enemies. We usually take this talent when Heart of the Wild or Dream of Cenarius are not a good option. Meaning, on encounters where the large 1-2 time boost to DPS and/or healing (primarily for Tranquility) is not needed/possible and you don’t have time to frequently cast Wrath. Due to these constraints, this talent is only very situationally taken.
Level 100: Moment of Clarity, Germination, Rampant Growth
Moment of Clarity
The weakest talent of the tier. Changes Omen of Clarity into Moment of Clarity, making Regrowth cost zero mana for 7 seconds. However, casting Regrowth back-to-back for 7 seconds is almost always a throughput loss. Additionally, you have no control over when the buff activates, meaning there will be times where you will not fully use the buff.
Germination
The strongest of the talents. Increases the duration of Rejuvenation by 3 seconds and allows targets to have two Rejuvenation buffs (from one druid) on them at the same time. The second Rejuvenation usually has high overhealing, but can be very useful on targets expected to take large amounts of damage. Often overlooked is the mana savings generated by Germination by the additional 3 seconds of Rejuvenation duration, meaning you need to refresh Rejuvenations less frequently.
Rampant Growth
A very situational talent and is required to be paired with Soul of the Forest. Allows you to activate the Soul of the Forest buff every other GCD for a large increase to throughput. However, this playstyle is extremely clunky and requires massive amounts of mana regeneration to be sustainable. Due to this, only consider this talent on very short encounters or those with a mana-return mechanic (ie. Mythic Brackenspore).
Glyphs
 Major
Major

Glyph of Regrowth
Guarantees that your Regrowth casts will always be a critical strike. Always take this talent, the guaranteed critical strike is almost always more useful than the very small Regrowth HoT.
Glyph of Wild Growth
Adds an additional heal over time effect to each Wild Growth cast. Do not use this glyph in 5-man content.
Minor
Glyph of the Sprouting Mushroom
Allows you to place your Wild Mushroom at a ground location rather than only under a targeted player.
Glyph of Grace
Situational damage reduction from falling.
Situational
Glyph of Stampeding Roar
Increases the range of Stampeding Roar and allows you to remain in caster form while casting it. This is usually our third major glyph.
Glyph of Rebirth
Causes our Rebirth to revive dead allies with full health. Only take this if you are your group’s primary battle resurrector.
Glyph of Enchanted Bark
Our Barkskin ability also makes us immune to interrupt and silence effects. Potentially useful on encounters with frequent interrupts.
Glyph of Nature’s Cure
Allows us to dispel two times in a row, but increases the cooldown of dispel charges by 4 seconds. Very situational, only take on encounters that require infrequent double-dispelling.
Glyph of Healing Touch
Healing Touch casts reduce the cooldown of Nature’s Swiftness by 2 seconds. Situational; useful if we are casting Healing Touch frequently.
Glyph of Rejuvenation
Reduces the cast time of Healing Touch by 10% when we have at least 3 Rejuvenation effects on the raid. Situational; useful if tank healing or casting Healing Touch frequently.
Stats
Intellect >> Spirit (Until Comfortable) > Haste => Mastery > Multistrike > Critical Strike = Versatility
Intellect is a primary stat that provides 1 Spell Power (SP) per point. Spell Power increases how much your spells heal for.
Spirit increases your combat mana regen. Once you feel comfortable with your mana, you can trade spirit for other stats. We recommend spirit levels around 1,500 (including average value from trinket effects) for most talent builds and encounters.
Haste increases casting speed and makes our heal over time abilities have more ticks that occur more frequently.
Mastery increases all of our healing, assuming you maintain 100% uptime on Mastery: Harmony.
Multistrike causes abilities to have a chance to hit a second and a third time, each dealing 30% of the initial damage.
Critical Strike increases the chance to critically hit with abilities and increases the chance direct heals cause Living Seed.
Versatility increases all damage and healing done, and decreases all damage taken.
Stat Math
The following information shows you how much second stat rating you need for a 1% increase in it.
1% increase in haste ~ 90 rating (Use HealerCalcs for exact value for your character)
1% increase in mastery = 88 rating
1% increase in multistrike = 66 rating
1% increase in critical strike = 110 rating
1% increase in healing from versatility = 130 rating // 1% decrease in damage taken from versatility = 260 rating
Gems & Enchants
Rings: Enchant Ring – Gift of Haste
Cloak: Enchant Cloak – Gift of Haste
Neck: Enchant Neck – Gift of Haste
Weapon: Enchant Weapon – Mark of Shadowmoon. You can switch to Enchant Weapon – Mark of Warsong if you have too much spirit.
Gems: Immaculate Haste Taladite
Consumables
Food: Buttered Sturgeon
Potion: Draenic Channeled Mana Potion for maximum regeneration. If you cannot channel for at least 7 seconds, use Draenic Mana Potion. If you do not need mana, use Draenic Intellect Potion.
Flask: Greater Draenic Intellect Flask
Augment Rune: Empowered Augment Rune or Focus Augment Rune
Race
Racials were rebalanced in Warlords of Draenor. Race matters far less, as most of the racial bonuses are very small and close in throughput increases. Pay special attention to the utility spells that races offer as well as the statistical differences below when choosing the optimal race:
- Alliance: Night Elf is the best race for Alliance due to the 1% increased haste during night time. During the day time, both Worgen and Night Elf provide 1% critical strike.
- Horde: Troll is the best race for Horde due to the Berserking cooldown which increases haste by 15% for 10 seconds every 3 minutes. Tauren provides a very minor healing boost due to their 2% increased critical strike healing (note: this is not a 2% critical strike chance increase, just a 2% increase in the resulting healing when you critically strike).
Boss Guides
The suggested talent builds for the fights below are meant to provide the best assistance to the raid team during progression. These are not the only viable talents, and various talent combinations work for many of these fights. Also, remember that the talents are selected to maximize the potential for success on progression, not for parsing. Finally, many talents are situational and are better for different raid teams, strategies, and healing compositions. Do not take these talent suggestions as law, they can be changed based on the individual situation.

Hellfire Assault
Talents
Incarnation and Heart of the Wild
Trinkets
Demonic Phylactery and Unstable Felshadow Emulsion
Strategy
This fight is generally pretty easy to heal and focuses mostly on tank healing when Beserkers are alive. Remember to keep lifebloom on your side’s tank and the person carrying the ammunition to the guns. Use Incarnation on the pull, then approximately three minutes later is when all the mini-bosses spawn (use Incarnation again), then use it off CD from there. The only source of significant raid damage (assuming Felcasters are handled properly) are the Demolisher tanks.

Iron Reaver
Talents
Soul of the Forest / Incarnation and Heart of the Wild
Trinkets
Demonic Phylactery and Unstable Felshadow Emulsion
Strategy
Pounding is the main source of high raid damage during this encounter. During this ability, place your Wild Mushroom in melee and use Heart of the Wild and Tranquility where assigned. Displacer Beast is very valuable for quickly dodging Barrage, Blitz, and crossing paths of Immolation. If your raid is having issues keeping up with killing Firebombs, Heart of the Wild cleaving (with Moonfire and Wrath) is very effective, although a substantial throughput loss.
Both Soul of the Forest and Incarnation are viable choices on this encounter. Incarnation (with Heart of the Wild) allows you to have a cooldown for 83% of Poundings (5 of every 6 poundings). However, Soul of the Forest is great for healing in between the Poundings. If your raid team is having issues healing Fire and Orb debuffs, take Soul of the Forest. Otherwise Incarnation is likely more useful.

Kormrok
Talents
Soul of the Forest and Heart of the Wild
Trinkets
Demonic Phylactery and Unstable Felshadow Emulsion
Strategy
Pound and Grasping Hands are the primary sources of damage during this encounter. Try to use Heart of the Wild when Pound and Grasping Hands are close enough together as to cover both with the healing buff. Additionally, use Tranquility during one of these abilities. Barkskin and Bear Form are helpful for soaking Explosive Runes. Use Stampeding Roar for Explosive Burst on the tank to help the raid move away from that player. Otherwise, Stampeding Roar is useful during Fel Outpouring phases to assist moving from the waves. Displacer Beast is invaluable for dodging Fel Outpouring dodging.

Hellfire High Council
Talents
Incarnation and Heart of the Wild
Glyphs
Glyph of Nature’s Cure
Trinkets
Demonic Phylactery and Unstable Felshadow Emulsion
Strategy
Make sure to track all of the Mark of the Necromancer debuffs (Mark of the Necromancer, Mark of the Necromancer, Mark of the Necromancer, Mark of the Necromancer, Mark of the Necromancer). Focus heal players with yellow and red versions of the debuff. Consider dispelling players with the red version of the debuff if Reap is not happening soon. If Reap is happening soon, do not dispel the debuff. Use Tranquility and Incarnation during Mirror Image phases. Wailing Horror phases on their own (without mirror images) do less damage than mirror images on their own, and usually do not warrant a major cooldown use. Save Heart of the Wild for healing during the final Dia burn when most of the raid has Mark of the Necromancer and Wicked Strikes are hitting hard. Use Ironbark and single target healing on targets with Fel Rage fixate. Soothe is helpful for keeping Fel Rage targets alive.

Kilrogg Deadeye
Talents
Soul of the Forest and Heart of the Wild
Trinkets
Demonic Phylactery and Unstable Felshadow Emulsion
Strategy
Use Tranquility during Death Throes casts. To avoid the swirls generated by Death Throes, move into melee when you are assigned to use Tranquility, this will prevent swirls from spawning on you (assuming the rest of the RDPS/Healers stay at ranged). Save Heart of the Wild for a late Death Throes cast, as its damage increases throughout the fight. If you are assigned for Vision of Death, keep all three players alive until you reach 20 stacks of the Undying Salvation debuff. Genesis has some use here to heal through the burst damage. Once you leave the Vision of Death, use your Cleansing Aura to clear Fel Corruption from players (primarily the tanks and melee). Finally, use Displacer Beast when you have Heart Seeker to spawn the Globule as far back from the boss as possible. While Incarnation can be useful as a cooldown for Death Throes, the fairly regularly occurring raid damage on this fight makes Soul of the Forest very useful.

Gorefiend
Talents
Incarnation and Heart of the Wild
Glyphs
Glyph of Blooming
Trinkets
Demonic Phylactery and Unstable Felshadow Emulsion
Strategy
While outside, remain spread and use Displacer Beast to move Touch of Doom out of the raid. Additionally, Displacer Beast can be used to move to players afflicted with Shared Fate (if you are chained with them). Use Incarnation/Heart of the Wild/Tranquility on the first Feast of Souls, Incarnation and Tranquility on the second Feast of Souls, and Incarnation/Heart of the Wild/Tranquility on the third Feast of Souls. If your raid only gets two Feast of Souls, use Heart of the Wild on either one and Incarnation/Tranquility on both.
Restoration Druids are generally seen as weak inside the stomach healing Essences. While we do not offer great burst healing, we can provide pretty solid healing to all of the essences. Put Lifebloom, and both Rejuvenations on all essences. Use Nature’s Swiftness and Swiftmend off CD to heal essences. This will provide high healing to all essences by the time they reach the center, so long as you swap to new essences as soon as they spawn and apply all HoTs. Remember to keep applying lifebloom to new essences – usually by the time the third essence spawns, the first has reached the center.

Shadow-Lord Iskar
Talents
Soul of the Forest and Heart of the Wild
Trinkets
Demonic Phylactery and Unstable Felshadow Emulsion
Strategy
Use Tranquility and Heart of the Wild during transition phases (when the boss flies away) and try to line it up with Focused Blast. Additionally, dispel Fel Bomb quickly if you have the Eye of Anzu. Use a Soul of the Forest buffed Wild Growth during each Fel Chakram combo. Additionally, make sure to heal up players with Phantasmal Wounds quickly to remove the debuff. Finally, use Stampeding Roar during Phantasmal Winds to assist raid members. Incarnation is useful if your raid is having problems healing the transition phases, however this is usually not an issue. If you do not have issues healing transition phases, Soul of the Forest’s sustained throughput is generally better. Most mythic strategies involve killing the Phantasmal Resonance before it casts Chains of Despair. If your raid is struggling with this, use Heart of the Wild to DPS the add.

Socrethar the Eternal
Talents
Soul of the Forest and Heart of the Wild
Trinkets
Demonic Phylactery and Unstable Felshadow Emulsion
Strategy
During the Construct phase, use Displacer Beast to quickly move Felblaze Charge out of the group. Additionally, run forward into Volatile Fel Orbs that are fixated on you before they reach the group. If you have a player kiting the Voracious Soulstalker add, be sure to put lifebloom and rejuvenation them before they leave range.
During the main boss phase, use Tranquility during Apocalypse. If your raid is struggling with killing Dominators quickly, you can use Heart of the Wild to assist in DPS. Otherwise, use Heart of the Wild for Apocalypse. There is very low tank damage during this main phase of the encounter. Due to this, have both lifeblooms on two of the Gift of the Man’ari targets. Put rejuvenation on all Gift of the Man’ari targets. Typhoon and Ursol’s Vortex are useful for controlling free Haunting Souls.

Fel Lord Zakuun
Talents
Incarnation and Heart of the Wild
Trinkets
Demonic Phylactery and Unstable Felshadow Emulsion
Strategy
Make sure to track all of the Befouled debuffs (Befouled, Befouled, Befouled). Apply both Rejuvenations and a Lifebloom to targets with Befouled to quickly heal off the debuff. Additionally, if you have Befouled, make sure to move away from other players as you explode when the debuff is removed. Use Heart of the Wild/Tranquility/Incarnation during the final phase, as he will be dealing significantly higher damage during this phase. Finally, use Displacer Beast to quickly move to your assigned Seed location.

Xhul’horac
Talents
Incarnation and Heart of the Wild
Trinkets
Demonic Phylactery and Unstable Felshadow Emulsion
Strategy
Make sure to save Heart of the Wild for the final phase, as his damage is drastically increased during this time. Use Wild Growth when Fel/Void Surges go out. Tank damage can be very high on this encounter and losing a tank is almost assuredly a wipe. Due to this, keep double rejuvenation and lifebloom on the tanks at all times. Make sure all your cooldowns are up for the final 20% as his damage is very high during this phase.

Tyrant Velhari
Talents
Incarnation and Heart of the Wild
Trinkets
Demonic Phylactery and Unstable Felshadow Emulsion
Strategy
Make sure to track Touch of Harm. Use both Rejuvenations and Lifebloom to heal off the Touch of Harm as quickly as possible during the first phase and the first half of the second phase. Once the raid’s maximum HP is pretty low, you want to keep both lifeblooms on the tanks at all times. Also, feel free to dispel the Touch of Harm if the player afflicted with it drops low in health or is targeted with Annihilating Strike or Edict. Displacer Beast can be very useful in phase one, as the blink movement does not count as normal movement, and thus you do not take any damage from Aura of Oppression. Use Tranquility during edict in phase 2. In the final phase use Tranquility following a Gavel of the Tyrant.
While Soul of the Forest showcases very high throughput on this encounter, due to the nature of “overhealing” in phase 2 and 3 (even though it is shown as effective healing on meters/logs), Incarnation is generally more useful for keeping the raid alive.

Mannoroth
Talents
Incarnation and Heart of the Wild
Trinkets
Demonic Phylactery and Unstable Felshadow Emulsion
Strategy
Use Tranquility/Incarnation during periods of high damage. Depending on your raid’s strategy, this is likely during Fel Hellstorm, Imp spawns, Shadowforce, and/or Gaze. Your cooldowns will likely be assigned for you. Ironbark is very useful for dispelling the Curse of the Legion. Since we are one of the few healers who can dispel curses, we can solo this mechanic. Simply Ironbark then dispel all Curse of the Legion targets. To be extra safe you can wait a second or two for your Disc Priest to shield them. Depending on your raid’s DPS you can either get one or two uses of Heart of the Wild in. If you can get only one, save it for the final phase. If you can use it twice, use it at the start of the fight and at the end of the fight. Your first Heart of the Wild is likely more useful to help quickly DPS priority targets than healing due to the very low raid damage in phase one/two.

Archimonde
Talents
Incarnation and Heart of the Wild
Trinkets
Demonic Phylactery and Unstable Felshadow Emulsion
Strategy
Heart of the Wild is very valuable on this encounter because you can easily get two uses from it. While on progression, using Heart of the Wild for DPS on the pull to help push the boss to 70% as quickly as possible is recommended. You will get a second use of Heart of the Wild during the last phase of the encounter. Displacer Beast and Savage Roar are useful for moving away from Shackled Torment and Seething Corruption. Remember to put Rejuvenation on targets soaking Doomfire before they move out of range.
Addons & Macros
Raid Frames

The primary addon for any healer should be their raid frames. There are several good raid frame addons available. The differences come down to personal preference. I recommend one of the following:
Grid
Grid2
VuhDo
Healbot Continued
WeakAuras 2
Easily one of the best addons in the game. Allows you to do almost anything, ranging from alerting you of a debuff to tracking raid wide cooldowns. Most guilds require this addons so players can import custom made strings for particular bosses.
WeakAura 2 Strings
Harmony Tracker – Appears when Mastery: Harmony has fallen off.
Lifebloom Tracker
Wild Mushroom Tracker
Stampeding Roar Tracker
Druid CD Bar (Originally created by Affinity)
Macros
Basic Mouseover Macro
Allows you to cast a spell on an ally by hovering over their raid frame and hitting the associated keybind. Replace SPELL with a spell name.
#showtooltip SPELL

/cast [@mouseover,help,nodead] SPELL
Nature’s Swiftness and Regrowth
You almost always consume your Nature’s Swiftness buff with Regrowths. Use this mouseover macro to cast an instant Regrowth.
#showtooltip Regrowth

/cast Nature's Swiftness

/cast [@mouseover,help,nodead] Regrowth
More Information
For more advanced information regarding restoration druid healing, please check out our various other articles!
In our tips and tricks series of articles we provide unique and interesting tips and tricks for healers on specific encounters. Which talent should you take on a particular fight? How do you deal with a certain mechanic given your toolkit? All of these are explained in the tips and tricks series!
Our encounter guides are different from other standard “factory-produced” guides because they focus primarily on the healer perspective. How is this different from the tips and tricks articles mentioned above? Tips and tricks focuses on advice for a specific class or specialization on an encounter. However, the encounter guides are more board and are aimed to help raid/healing leads understand all the healing details of a fight.
Self-explanatory! Our best in slot lists are constantly updated following hotfixes, patches, or anything else that alters what gear we are going after. Don’t worry about doing all the tricky math, we’ll do it for you.
Almost everything else can be found on our theorycraft page! Many of our readers found us through our various spreadsheet work (example 1 & 2), and we plan to continue to provide the community with great tools to evaluate their healers.
Conclusion
Thank you for taking the time to read my restoration druid guide! I hope that it was helpful and insightful for you. If you have any questions at all please feel free to put a comment below or tweet us @Healcraft and I will attempt to answer them as soon as possible. As always, if you believe anything to be inaccurate or out of date, please let us know! Finally, there is only so much you can include in one healing guide, so be sure to check out all of our advanced healing resources. Again, thanks for reading and happy healing!
