
Welcome to World of Healcraft’s raid guide for the Horridon encounter in the Throne of Thunder instance! Please note, since we are primarily a healing resource website, the majority of the following will cover what healers need to do in this encounter (although we will cover the basics which effect all roles in the fight).
Introduction
 Horridon is the second encounter in the Throne of Thunder. He is a 2 phase (depends on how you think of it) fight with an emphasis on add control and avoidable damage. Horridon, the main boss, is the giant dinosaur; however, your raid does not actively work on killing him until the very of the fight. Your raid must first kill four different sets of adds and a mini-boss. We recommend 3 tanks, 5-6 heals, and a mixed make-up of DPS. Any DPS with the ability to dispel themselves, and others, are very helpful as well.
Abilities
Horridon himself has a very limited set of abilities that he actually casts. First, he does a generic tank swap debuff called Triple Puncture. Second, he will periodically cast Double Strike (see above image), doing a frontal and rear cone. Finally, Horridon will cast Charge, targeting a random raid member, charging to their location, and immediately casting Double Strike.
In addition to dealing with Horridon’s abilities, many different types of adds will spawn throughout the encounter. There are four different sets of adds, each with their own ability pool. They will always spawn in the same order, from the same doors, so the fight is extremely predictable. In addition, every set of add is similar in the fact that they have two abilities that are similar. Each set of adds will have some kind of void zone that they put on the ground, and a dispelable debuff which will damage random players. First, the Farraki will spawn. The Farraki’s void zone is the Sand Trap which will do massive damage to anyone standing in it, and it will grow larger as the fight progresses. In addition, the Farraki will also put Blazing Sunlight on several random raid members. This will do ticking damage to the target, and we advise dispelling this magical debuff as soon as possible.
Next, the Gurubashi. Their void zone is Living Poison. This will spawn a green void zone under a random player, and do massive damage over time. In addition, this void zone works similarly to Feng the Accursed’s Wildfire Spark fire patches, as they move around in their general area. Also, the Gurubashi will cast Venom Bolt Volley which will put a poison debuff on every member in the raid. However, Venom Bolt Volley is interruptable. If the interrupt is missed, healers can also try to dispel high priority targets (ie. tanks). A Mistweaver Monk’s Revival CD is especially useful here.
Next, the Drakkari. This door will have three different types of adds: Risen Warriors, Risen Champions, and Frozen Warlords. The warriors and champions will periodically become untankable and fixate on a random player. Each time they melee that player, they will but a disease debuff on them. The Frozen Warlord will periodically cast this door’s void zone, the Frozen Orb. This orb will do massive damage and slow anyone near it. In addition, the orb will move around, like the Living Poison, so stay clear.
Finally, the Amani. There are several adds at this final door. First, there are Flame Casters. These adds will cast Fireball on random raid members nonstop. This is interruptable, so be sure to try to minimize damage taken from these adds. Next, the Warbears and Beast Shamans. The bears will spawn periodically with shamans riding their backs. The bear will do a 5 yard cone cleave. The shaman will do several abilities. First, the shaman will cast chain lightning on a random raid member. Next, the shaman will randomly curse debuff a raid member with Hex of Confusion. This will cause that player to have a 50% chance to deal 100k damage to themselves every time they use a spell or ability. Finally, the shaman will drop Lightning Nova Totem. This totem is this door’s void zone. The totem is stationary and will pulse AoE damage around it.
After you finish all the doors, War-God Jalak will spawn shortly afterwards. Jalak must be tanked and he only have one ability. He will periodically cast Bestial Cry which does moderate to high damage to the entire raid. In addition, each cry will do 50% more damage than the previous, stacking on itself. When Jalak dies, Horridon will do 100% more damage and attack 50% faster.
Strategy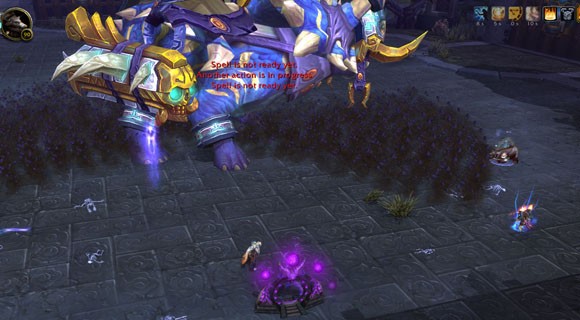
Execution of the Horridon encounter comes down efficient dispelling of debuffs and everyone staying out of the various void zones. On all doors (except the third) have ranged and healers be spread out. In order to have any particular door “end”, you must kill the Zandalari Dinomancer which will spawn after a certain period of time. All DPS should immediately switch to this add. Once at 50%, the Dinomancer will drop an orb. When this orb is clicked, Horridon will charge the door and stop adds from spawning from it. Next on the DPS priority should be the adds that cast the debuffs and/or void zones. On the first door, DPS should prioritize the Wastewalkers. Second door, Venom Priest and Effusions should be killed as soon as possible. On the third door, everyone should stack up so that all the adds can be AoE/Cleaved down to minimize the amount of diseases put out. On the final door, Shamans should be killed first, then the Flamecasters.
It is important to have any class that can dispel, to dispel. Many DPS specs have the ability to dispel themselves (and others) and this should be used to the fullest. For example, on the magical debuff (first door) all players with the debuff can stack on a particular marker, and a shadow priest can mass dispel the debuff off. On the second door, we recommend taking a Mistweaver Monk. Once all the Venom Priests and Effusions are killed, have the Mistweaver pop Revival to clear the raid of all poison. On the final door, many classes can remove the curse (all druid specs, mages, etc.).
In the final phase, you want to have one tank on Horridon, facing him perpendicular to the raid, so that the raid members are standing by his side. War God Jalak should be there as well, with all raid members (except the Horridon tank) stacking under him for AoE heals and CDs. The major damage in this phase will come from Jalak’s Bestial Cry. To deal with this, set up a healing CD rotation for cries. In addition, we recommend using your second potion and Heroism/Bloodlust when Jalak spawns. Once Jalak is dead, there is zero raid damage, and healers should focus on keeping the tanks alive (as Horridon will be doing significantly increased damage).
Finally, Horridon will periodically cast “Charge” on a random players throughout the course of the entire fight. When this happens, to allow for minimal raid movement and damage, have the charged player run to the Horridon tank, and stack on him for the charge. This way, Horridon’s orientation to the raid never changes, and you will never have a double swipe in the middle of the ranged. Obviously, after Horridon charges, have the targeted players and the tank move out of the double swipe.
Healing Perspective
This fight has minimal raid damage until the very end, if people are good about not standing in things. Your job as a healer for the majority of the fight will be properly handling dispels. In order to make this boss as easy as possible, we recommend a well diversified healing composition, so that all debuffs can be dispelled. Mistweaver Monks are exceptionally strong for the poison door, due to their ability to completely remove all poison debuffs from the raid. In addition, Resto Druids are extremely potent dispellers on this encounter, as long as there is a paladin present in the raid. If the Druid puts symbiosis on a paladin, it will gain “Cleanse“. This allows the druid to dispel every type of debuff in the game. In addition, cleanse is on a separate 8 second CD from the Druid’s natural dispel, so on certain doors you can get 2 dispels per 8 seconds. Finally, a Discipline Priest is the strongest throughput healer on this fight. Horridon will have an ever-growing damage taken debuff on him during the entire fight. Due to this, Disc Preist’s atonement is ridiculously strong for healing this encounter. With a Monk and Druid handling the majority of dispelling, and the Disc Priest smiting the boss, healing should be pretty simple for this fight.
Conclusion
We know this fight has been a bit of a brick wall for many 10m raid groups, due restrictions on the amount of dispels in the 10m environment. However, if you read the section above, we illustrate the optimal healing composition for a 10m. With that composition, and with help from DPS dispels, debuffs should not be a big issue. On the other hand, 25ms will have little to no trouble with this fight. It should be a push over. If you have any comment, questions, concerns, and corrections please post a comment below, and Happy Healing!

One comment