
As previously stated we are not going to be putting out full raid guides for normal mode content this tier. However, in order to accommodate raiders still on normal mode content, we are posting this brief “guide” to all the bosses in a paragraph or less each.
Jin’rokh the Breaker
Detailed Guide: https://healcraft.net/2013/02/18/raid-guide-jinrokh-the-breaker/
This fight has very simple mechanics. You will want 2 tanks, 4-6 healers, and a balanced mix of DPS. The tanks need to taunt off each other for the Static Wound debuff as much as possible, however other mechanics can hinder taunting off perfectly. Four times over the course of the fight Jin’rokh will toss a tank into a statue around the room, causing a pool to spawn. This pool grows in size over time, and increases damage done and healing taken to people in the puddle. Everyone except the tanks should stack in the puddle. Occasionally he will also cast focused lightning, spawning an orb which will fixate on a random raid member. This raid member should kite the orb to the outside grates around the room, let it collide with him/her, then get back in the puddle. Also four times over the course of the encounter Jin’rokh will cast Lightning Storm. This will do moderate-high raid damage to everyone and electrify any puddles in the room, making them lose their beneficial buff and instead kill anyone standing in them. During storm have everyone stack under the boss and pop defensives and healing cooldowns. Soon after another puddle will spawn. Rinse-repeat until dead.
Horridon
Detailed Guide: https://healcraft.net/2013/04/26/raid-guide-horridon/
Horridon is essentially an add control fight. The majority of the fight will be spent DPS’ing adds, not Horridon himself. There are four doors around the room which will spawn adds. All the doors have different adds, however, they all cast similar abilities. All the adds cast a type of void zone, never stand in anything put on the ground. Also, all the adds will cast a debuff on raid members. First magic, then poison, disease, and curse. Try to have a good mix of healing classes to deal with all the different dispelable debuffs. When a Dinomancer spawns at each door, get him to 50% quickly, as he will drop an orb. Someone needs to click the orb and and this stops adds from spawning from that door for the rest of the fight. Once all the doors are closed War-God Jalak will spawn. He will do moderate raid damage periodically. Have everyone stack under the War God and blow CDs and Heroism/Bloodlust. After Jalak is dead, Horridon will enrage and start doing more damage to the tanks. Have tanks taunt off as they run out of defensive cooldowns. Also, there is zero raid damage during this phase (once Jalak is dead), so healers should just focus on tank healing. Once Jalak is dead, the fight is almost assuredly a kill.
Council of Elders
 This encounter is very reliant on individual situational awareness, as many thing will be happening as once and raiders need to distinguish what to do. This is a council style encounter with 4 bosses that do not share health pools. Each has completely different abilities, and their abilities become modified when they become “empowered.” The spirit of Gara’jal will first empower the Frost King, then once he takes 25% of his total HP Gara’jal will jump to another boss. This happens the entire fight. When empowered the boss gains an energy bar, when it reaches 100/100, the raid will take massive damage, causing a wipe. Make sure the empowered boss is DPS’d for 25% of it’s total HP before 100/100 energy. Most of the bosses also put bad things on the ground, do not stand in them. However, a few mechanics are important to note. When the Frost King is empowered, he will cast Frostbite on a random player. The player takes moderate damage split among nearby raid members. Have some raid members stack with the debuffed player. The Priestess also will spawn adds occasionally, have ranged to the add and burn it. Stuns, slows, knockbacks, etc. all work on this add. We also recommend having a portion of your raid DPS tunnel Sul, the sand boss, as he is the most punishing. Once he is out of the way, the fight becomes trivial.
Tortos
Terrible Fight. The mechanics are extremely annoying, but pretty simple. Tortos will occasionally summon three spinning turtles. They will randomly move around the room and knock anyone up into the air which they collide with. Ranged DPS should be focusing down the shells one by one. Once the shells are dead, they become stationary and can be kicked by nearby players with the extra action button. Then the shells hits an enemy, when kicked, it will interrupt them and put a damage taken buff on them. Occasionally Tortos will cast Furious Stone Breath. If you allow him to finish casting this, it will wipe the raid. So make sure you have a turtle shell lined up to interrupt this cast when it comes. Tortos will also do a Quake Slam, which will stun all players and do moderate damage. An easy way to deal with this is to pop a healing CD during this. If the healer requires channeling for their CD, aka Druids, have a paladin BoP them to avoid the stun. Throughout the fight spikes will also fall from the ceiling. They are indicated by a blue circle on the ground. If you are in the circle when the spikes fall, you will take large damage. Also, the spikes will splash damage, doing damage to people the closer they are to the circle. Finally Tortos will also summon bats. A tank needs to pick these up and pop a defensive when they are all alive. They can be stunned, and AoE stuns should be used frequently to reduce tank damage. We position the bats in front of Tortos, so shells kicked into Tortos will also debuff the bats. In addition, we have melee sit on the bats, cleaving them and Tortos down the entire fight. Rinse and repeat, and the boss will die.
Megaera
Detailed Guide: https://healcraft.net/2013/03/08/raid-guide-megaera/
This encounter’s difficulty very much depends on the size of your raid team. 10m’s have had a bit of trouble with this encounter, while it is a push over for 25m’s. On normal mode there are three different types of hydra heads; Green, Red, and Blue. When you “kill” a head, it will move to the background and start casting it’s unique ability (corresponding to it’s color) on the raid for the remainder of the fight. So, you can choose what mechanics, and the frequency of them, to suit your raid team. Red’s will cast the Cinders debuff on a random raid member. This is a DoT which will do increasing damage to the player the longer it is present. It is a dispelable magical debuff. However, when dispelled the a void zone of fire will spawn under the dispelled player. To deal with this, just have the debuffed player move away from the raid and have him/her dispelled. The blue head will cast Torrent of Ice, which will spawn a beam of ice that will fixate on the targeted player. The player must kite this beam away from the raid, as it does massive damage to anyone hit by it, and leaves patches of icy void zones behind it. Finally, the green head will cast Acid Rain. Acid rain will target an area on the ground with a green swirl. Seconds later, everyone in the raid will take damage, with the amount being determined by your proximity to the swirl. Just have everyone move away from it. Just figure out which of these debuffs your raid is good at, and try to get those as much as possible while minimizing the ones you are bad at.
Ji-kun
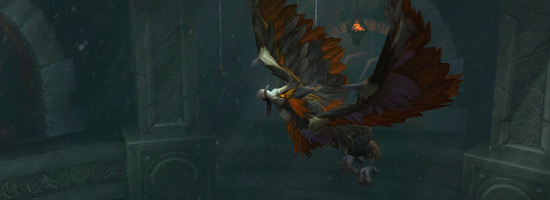 Ji-kun is an interesting encounter. There are a lot of unique things that need to be done in the fight in order to accomplish your task of killing this bird. Let’s go over the basic abilities. First, Ji-Kun will periodically cast Caw, doing moderate damage to random players and anyone within 8 yards (So, spread out!). Next, she will also cast Feed Young often. She will shoot green globs up into the air, which will then rain down on the main platform. These form small green pools. These pools can be “soaked up” but standing in them and popping a defensive. To make this easy, have the tank who does not currently have the boss, run around soaking pools. Also, the large damaging ability in this fight is known as Quills. From time to time she will cast it and start doing massive damage to the raid. Quills is channeled by her, so she cannot do any of her other abilities during it. Due to this, have everyone stack under her for AoE healing as she cannot Caw during this time. However, have ranged and healers spread out 1 second before Quills is over, as she typically immediately casts Caw after a set of Quills. Finally, she will do Down Draft. This is essentially “Get Away!” that Lei Shi did last tier, albeit a bit more of a push back. You need 41%+ movement speed to have neutral momentum against the wind (meaning, you are not losing ground nor gaining ground). An easy way to deal with this is to have everyone run to melee right before Down Draft and have a druid pop Roar. Now, lets talk about the fight’s major mechanic, nests and flying. Ji-kun will continually “activate” nests that are around the room, spawning small birds on them. You must have a team of raid members go down (or up) and kill these birds ASAP, as they will do moderate-large raid damage if left up for too long. When you kill the birds on lower nests, they drop feathers. Walk over the feather to get an extra action button that allows you to fly. Use this to reach “upper” nests when needed. Also, if you intercept her “Feed Young” globs in the air, you will receive a significant DPS/Healing buff. The easiest way to deal with this fight is to set up 5 groups of 4-5 people that each deal with 1 lower and upper nest. Once everyone figures out their groups and nests, this should be an easy kill.
Durumu the Forgotten
One of my favorite fights this tier. The fight has three major phases, each with unique abilities and some shared abilities. There is also one ability that is present in all phases of the fight (although usually not in the “maze phase” if you do things correctly). This is Life Drain. A beam will randomly target a raid members and stun them, then start stealing life from them and giving it to Durumu. The player also gets a stacking debuff every second that increases the amount of life is given to Durumu. Any other player can intercept the beam (going in between the beam’s origin and the initially targeted player) and get stunned and life drained. You want to rotate people in getting life drained, so the debuff does not get too high on any particular player, and subsequently heal Durumu for a too much HP. The first phase is going to be the “normal” phase. This phase is generally considered the easiest and the time where DPS should be popping CDs to burn the boss. The only major ability in this phase will be Lingering Gaze. This will target a few random raid members and mark them. Soon after they will drop a void zone underneath them and take low damage. Have these people run to the outside of the room for the pools to drop. Next is the light spectrum phase. Three beams of light will target three random raid members (yellow, blue, and red). Have these players spread out so that the beams are not overlapping. Then, the beams will “fully” spawn and start doing split damage to everyone inside of them. The yellow beam also leaves its targeted player and starts moving on its own. To end the phase you need to have the player with the red beam run around the room and find three red adds. These adds need to be DPS’d down quickly. There is also one blue add, and if it is revealed it will do massive raid damage. So, you want blue to stand completely still the entirety of this phase. In addition, since this beam will be stationary, put all of your healers in it, so they can just stand and heal. Have your tanks run around in the yellow beam with some RDPS. Then have the rest of the DPS run in the red beam killing adds. The final phase is the infamous “maze phase.” Durumu cast a giant cutter beam in front of him at the beginning of the phase. Contrary to common sense, you actually want to stack under this beam at first and wait to see what side to move to. The black maze will either start spawning on the right or left hand side of him. Move to the side it starts on, and hug the wall of black. From there on it is just about staying ahead of the cutter beam and following the maze (which is now much easier to see). Rinse and repeat these phases and Durumu will die!
Primordius
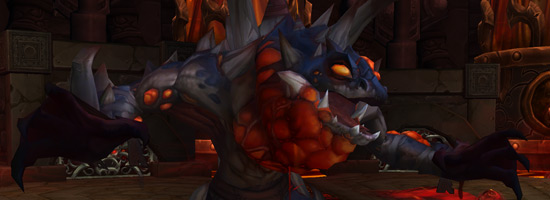 Perhaps unfortunately, this fight is really really easy. Due to this, I am not going to go into detail about every ability, as the current normal mode strategy ignores almost everything. You are in a room with the main boss Primordius, and small red oozes are going to spawn continuously throughout the fight. The oozes will run towards Primordius, and if they reach him they will give him a buff and eventually new abilities. However, this is usually not an issue. Also, Primordius takes significantly reduced damaged from all players unless you have a particular buff. You gain buffs by killing the small oozes and walking over their red remains. It is important to remember this, as red remains will buff you, purple remains will debuff you. You want to have DPS team up and select a particular “lane” of oozes to be theirs. They will ignore the boss and kill oozes, picking up buffs when the oozes die. You can get a multitude of random buffs, including Stats, Crit, Mastery, and Haste. Once you get 5 buffs, you will transform into a lizard and gain the “lizard buff.” At this point you will deal normal damage to Primordius, bypassing his damage taken reduction. Once you have the lizard buff, pop your CDs and burn the boss. Once your lizard buff, and the other buffs, run out, you just go back out and kill oozes to get it again. Rinse, repeat. There are a few important things to remember. Purple pools are very bad, they will put a negative debuff on you. Also, walking over more red pools after already being a lizard will be negative debuffs. Once you are a lizard, do not pick up any more buffs until it wears off. Also, if a purple pool is placed near Primordius he will eat it and gain health back. Due to this, try to avoid all cleaves and AoEs so that oozes do not die near Primordius. This reduces the risk of purple pools being eaten, and red pools from dropping under melee and giving them negative debuffs. Have tanks kite Primordius around the room as purple pools will inevitably get close to him eventually. Pop your Heroism/Bloodlust once all the DPS get lizard buff at the beginning.
Thanks for reading, and feel free to leave us a comment below or tweet us @Healcraft!
